Guard Break & Break Markers
Most players who say their damage is "too low" are hitting an intact guard. Aincrad hides a second health bar behind every shielded enemy and every boss: this guide covers Break Markers, the Break Gauge, Crush Attacks, which weapons break fastest — and the six-step rotation that turns every stagger into a health bar deleted.
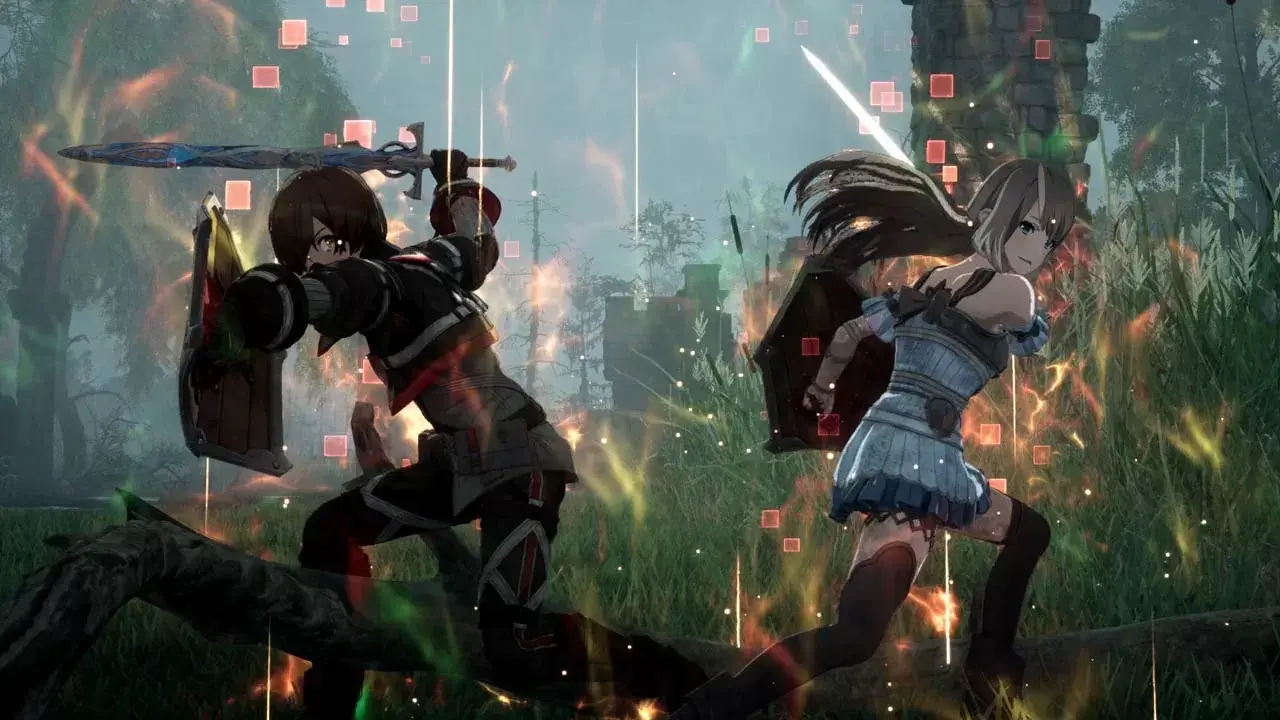
Against a guarding enemy the Break meter is the real health bar — raw DPS is absorbed until it shatters.
Four Words for One System
Break Marker, Break Gauge, Fragility, stagger — guides use all four and players assume they are separate mechanics. They are stages of the same loop: strip the layer, collapse the enemy, cash in the window.
Break Marker
The visible guard layer on shielded or armoured enemiesSome enemies project a defensive marker that absorbs frontal light attacks. It can be a shield, a plate, or a body part such as a horn. Reduce it to zero and the enemy is opened up. Update Ver. 1.0.4 specifically fixed cases where destroying a Break Marker failed to trigger the enemy's next phase.
Break Gauge
The meter that appears while you attack a guarding enemyAttacking into a raised guard surfaces a gauge instead of dealing meaningful health damage. Crush Attacks drain it fastest. Emptying it produces a Guard Break and a window of full vulnerability.
Fragility Gauge
Boss-side posture that decides when the fight actually startsOn large enemies the same idea scales up: heavy attacks and blunt weapons shatter posture fast, and the collapse exposes a vulnerable core. On the Sentry Golem the correct opening priority is filling the Break meter, not chasing raw DPS.
Stagger Window
The payoff — a timed period of removed damage reductionAfter a break the enemy drops its armour protection and damage spikes. This is where your SP, Sword Skills and Combination Skills belong. The window closes on its own, so plan the rotation before you swing.
Break Power by Attack Type
Every action you can take carries a different amount of Break damage. The gap between a light attack and a Crush Attack is enormous — which is why combo length has almost nothing to do with how fast a guard falls.
| Action | Stamina | Break Power | When to Use It |
|---|---|---|---|
| Light Attack | Low | Minimal | Combo filler and SP generation. Almost useless against an intact Break Marker — this is the mistake nearly every new player makes in the prologue. |
| Heavy Attack | High | Good | Your bread-and-butter Break tool. Leaves you vulnerable during the swing, so land it after a dodge, a parry, or during an enemy recovery frame. |
| Crush Attack | Very high | Highest | Hold the heavy input to charge. Built specifically for Guard Breaking — the fastest legitimate way to strip a marker, but the long commitment means you need a real opening first. |
| Jump / Sprint Attack | Medium | Situational | Extra attacks executed from a sprint or a jump. Useful for opening on a guarding enemy from an angle it is not facing, rather than trading into the shield. |
| Sword Skills | SP cost | Varies by skill | A handful of skills carry crush properties — Fulmination is the dagger's only true crush option and can delete a kobold's shield outright. Check each skill's behaviour before assuming it breaks guard. |
| Parry / Reversal Slash | None on success | Stagger only | Defensive counters stagger the attacker without draining the marker. They buy you the opening in which a Crush Attack becomes safe to throw. |
A Crush Attack is simply a held heavy attack. If you have never used one, you have been playing the whole game without its dedicated Guard Break tool.
Which Weapons Break Guards Fastest
Break output is one of the biggest hidden differences between weapon types. Blunt and two-handed weapons shatter posture quickly; precision weapons have to route around it with specific skills.
| Weapon | Break Tier | Shield | Notes |
|---|---|---|---|
| Mace | S | Yes | The all-round stagger weapon. Blunt impact shreds guards while the shield slot keeps you safe through the slow wind-ups. |
| Two-Handed Axe | S | No | Biggest single-hit Break numbers in the game and the best AoE, paid for with the worst mobility. Position first, then commit. |
| Two-Handed Sword | A | No | Long reach and heavy arcs make Break pressure easy to apply, but every miss is a full recovery animation. |
| One-Handed Sword | B | Yes | Balanced Break output. Charged heavies get there; you just need one or two more of them than a blunt user does. |
| Rapier | C | Yes | Thrust damage is poor at breaking guards. Play the parry game instead and use counter windows for health damage, not Break damage. |
| Dagger | C | No | Lowest raw Break power, but Fulmination is a genuine crush skill — level it and you can strip markers that light chains never will. |
Break tiers describe posture damage only, not overall strength. See the weapon tier list and best starting weapon for the full picture.
The Six-Step Break Rotation
Every guarded fight in the game follows the same shape. Learn the loop once and it transfers from field elites to the Floor 2 boss without modification.
Identify the layer
Attack once and watch what appears. A gauge means guard, a highlighted body part means a destructible marker, no indicator means you can go straight for health damage.
Create the opening
Crush Attacks are too slow to throw blind. Bait a big swing, parry it or perfect-dodge it, and use the recovery frames as your charge window.
Commit in bursts
Break progress decays when you disengage. Land your Break damage back to back — a Crush Attack chained into a heavy combo beats twice as many cautious pokes.
Bank SP while you break
Light attacks and connected hits build SP. The break phase itself is your resource-generation phase, so you arrive at the stagger with a full bar.
Dump everything on the stagger
Armour protection is gone. Chain your strongest Sword Skills, fire a Combination Skill if the gauge is charged, and target the exposed core or broken part.
Reset before recovery
The enemy stands back up with a swing. Back out one beat early with a third of your stamina in reserve rather than greeding the last hit.
Not Every Marker Is a Shield
The detail that trips up players who arrive from other action RPGs: what breaks is often a body part, and different parts have wildly different thresholds.
- ◆Carried shields. Kobold-type enemies block frontally with a buckler. A single strong crush skill can remove it outright, after which they fight with no guard at all.
- ◆Horns and plating. Horned beasts hold far tougher markers than a hand-held shield. The same skill that deletes a kobold buckler may bounce off a mountain goat's horn — bring blunt damage for those.
- ◆Boss cores. Large bosses expose a vulnerable core only after collapsing. The Sentry Golem is the tutorial for this — its armour protection disappears entirely during the stagger.
- ◆Guards are directional. Markers only cover the direction the enemy faces. Circling with a partner in Switch Mode lets you skip the break entirely on many field enemies.
- ◆Phase gates. Some enemies transition phases when a marker is destroyed at low HP. Ver. 1.0.4 fixed cases where that transition failed to fire — update before reporting a stuck boss.
Six Mistakes That Keep Guards Up
If a fight feels like a damage sponge, it is almost always one of these — not a level problem and not a gear problem.
| Mistake | Why It Fails | Fix |
|---|---|---|
| Spamming light attacks into a raised guard | Light hits barely register on the Break Gauge | Switch to heavy or charged Crush Attacks, or reposition to an unguarded angle. |
| Using Sword Skills before the break | Damage reduction is still active | Hold SP through the break phase and release it inside the stagger window. |
| Chasing DPS on a boss with an intact marker | Health damage is heavily absorbed | Treat the Break meter as the real health bar for the first phase of the fight. |
| Attacking a horned or shielded body part with the wrong tool | Some parts have far higher break thresholds | A skill that deletes a kobold shield may not break a beast's horn — bring blunt damage or a crush skill for those. |
| Emptying stamina to force one more crush | A whiffed charge leaves you fully exposed | Keep a third of the bar for the dodge you will need when the swing comes back. |
| Ignoring your partner during the break phase | Combination Skills are free stagger damage | Use Switch Mode to pull aggro, break from behind, then trigger the team-up when the marker drops. |
Build for Break Damage
Weapon choice, EX-Mods and Sword Skill levels all feed your posture damage — line them up before the next armoured boss.
Frequently Asked Questions
What is a Break Marker in Echoes of Aincrad?
It is the defensive layer some enemies put between you and their health bar. While it is intact, frontal light attacks accomplish almost nothing. Whittling it down to zero triggers a Guard Break and leaves the enemy vulnerable. The marker is not always a shield — it can be a body part such as a kobold's buckler or a horned beast's horn.
How do you perform a Crush Attack?
Hold the heavy attack input instead of tapping it. The charged swing is a Crush Attack: expensive in stamina, but it deals far more Break damage than any normal hit and is the intended tool for tearing down guards.
Which weapon breaks guards fastest?
Blunt and heavy weapons. The Mace is the all-round stagger pick and keeps a shield; the Two-Handed Axe posts the biggest single-hit Break numbers with the worst mobility. Daggers and Rapiers have the weakest raw Break output and route around it with specific skills such as Fulmination.
What should I do during the stagger window?
Spend everything. Damage reduction is gone, so dump SP into your strongest Sword Skills, fire a Combination Skill if the gauge is charged, and keep hitting the exposed part until it recovers. Hoarding resources for a later phase is the most common reason a fight drags.
Does the Break Gauge reset if I back off?
Break progress decays when you disengage, so cautious chip damage rarely gets there. Deliver Break damage in committed bursts — a Crush Attack chained into a heavy combo — rather than spread across a long, careful fight.
Does breaking matter more in Death Game Mode?
Yes. Shorter fights mean fewer chances to make a fatal mistake, and the stagger window is where fights get short. Permadeath runs lean heavily on high-Break loadouts precisely because they remove enemies before mistakes accumulate.